Plugin Settings
Solspace Freeform includes several settings that allow you to customize your form management experience. To adjust your settings, click the Settings menu item while in the Freeform plugin, or go to Settings > Plugins > Freeform and click the settings link.
If you wish to override these settings with a config file, please see the Config Overrides documentation.
The settings allow you to adjust:
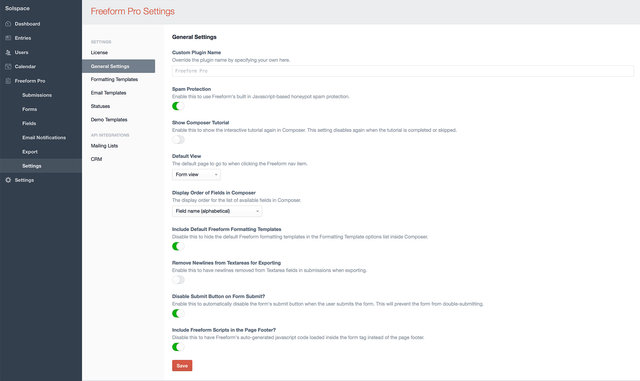
General Settings
- Custom Plugin Name #
- Override the plugin name by specifying your own here.
- Spam Protection #
- Freeform includes its own Javascript-based honeypot spam protection. This is enabled by default, but can be disabled here.
- For more information, visit the Spam Protection documentation.
- Show Composer Tutorial #
- Enable this to show the interactive tutorial again in Composer. This setting disables again when the tutorial is completed or skipped.
- Default view #
- This setting allows you to specify which Freeform page should be loaded by default when clicking the Freeform navigation link.
- Display Order of Fields in Composer #
- The display order for the list of available fields in Composer:
- Field type, Field name (alphabetical)
- Field name (alphabetical)
- The display order for the list of available fields in Composer:
- Include Default Freeform Formatting Templates #
- Disable this to hide the default Freeform formatting templates in the Formatting Template options list inside Composer.
- Remove Newlines from Textareas for Exporting #
- Enable this to have newlines removed from Textarea fields in submissions when exporting.
- Disable Submit Button on Form Submit? #
- Enable this to automatically disable the form's submit button when the user submits the form. This will prevent the form from double-submitting.
- Include Freeform Scripts in the Page Footer? #
- Disable this to have Freeform's auto-generated javascript code loaded inside the form tag instead of the page footer.
- Freeform will automatically insert javascript in the footer of the page for features such as Spam Protection, Submit disable on click, and other special fieldtypes. If you prefer to have this load inside the
<form></form>tags, you can disable this setting.
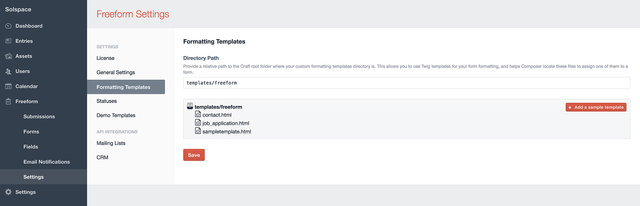
Formatting Templates
- Directory Path #
- When using custom formatting templates for your forms, you'll need to specify where your Twig-based templates are stored.
- Provide a relative path to craft root to your custom form templates directory.
- E.g. templates/freeform
- To add a starter example template, click the "Add a sample template" button, and then edit the template after.
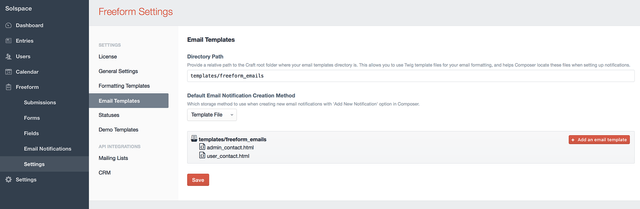
Email Templates
- This area is for users that wish to use Twig-based HTML template files for email notifications. See Email Notifications documentation for more information about implementation.
- Directory Path #
- Provide a relative path to craft root to your custom form templates directory.
- E.g. templates/freeform_emails
- To add a starter example template, click the "Add a sample template" button, and then edit the template after.
- Provide a relative path to craft root to your custom form templates directory.
- Default Email Notification Creation Method #
- Select which storage method to use when creating new email notifications with Add New Notification option in Composer.
- Database Entry - Use CP-based database template editor.
- Template File - Use Twig-based HTML template files.
- Select which storage method to use when creating new email notifications with Add New Notification option in Composer.
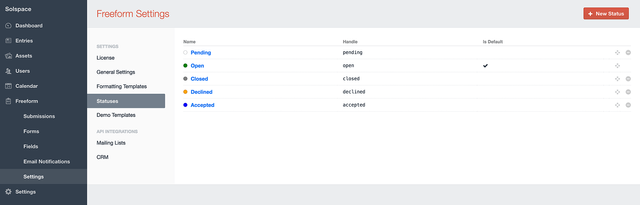
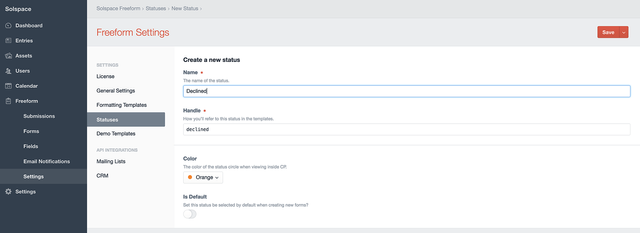
Statuses
- This area allows you to manage and create new statuses for your forms.
- You can set the default status to be set for all forms here.
Demo Templates
Allows you to install the Demo Templates to get Freeform up and running on the front end with just a couple clicks!
Spam Settings
- Spam Protection #
- Freeform includes its own Javascript-based honeypot spam protection. This is enabled by default, but can be disabled here.
- For more information, visit the Spam Protection documentation.
- Spam protection simulates a successful submission? #
- Enable this to change the spam protection behavior to simulate a successful submission instead of just reloading the form.
Captchas
reCAPTCHA
- Enable reCAPTCHA #
- Enable this setting and fill in the reCAPTCHA Site Key and Secret Key to enable reCAPTCHA for Freeform. Then, to add reCAPTCHA to your forms, open up and edit each form and drag over the reCAPTCHA special field anywhere you like into your form layout.
API Integrations
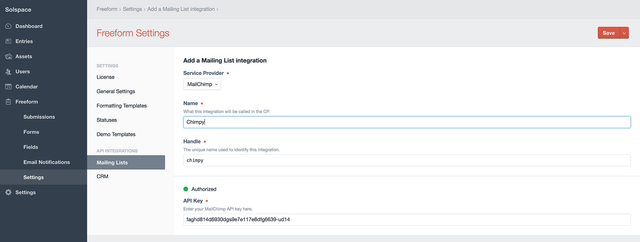
Mailing Lists
- The Mailing Lists area allows you to manage your mailing list API integrations.
- Mailing list integrations are set up here and are globally available to all forms, but are configured per form inside the Composer interface.
- Included with Lite edition is access to connecting to the Craft Campaign plugin.
- To connect to a mailing list API, click the New Mailing List Integration at the top right.
- View the Mailing List API Integration documentation for more information about setting up and configuring.
CRM
- The CRM area allows you to manage your CRM (Customer Relationship Management) API integrations.
- CRM integrations are set up here and are globally available to all forms, but are configured per form inside the Composer interface.
- To connect to a CRM API, click the New CRM Integration at the top right.
- View the CRM API Integration documentation for more information about setting up and configuring.